
Opening Words
As someone born after 1995, I deeply understand the importance of kitchen management in living alone. When I first started living independently, I frequently encountered various frustrating situations: peanut butter would separate after a short time, with oil floating on top and the bottom becoming as dry as mud; newly bought herbs would wilt like frost-bitten plants after a few days in the refrigerator; and after cooking, the kitchen would look like it had been ransacked. After years of trial and error, I've grown from a kitchen novice who couldn't even fry an egg without burning it to a culinary expert who can manage everything effectively. Today, I want to share some super practical kitchen tips I've summarized during this process, and I believe these experiences will help you improve your kitchen management skills.
Ingredient Management
The Secret of Peanut Butter
I remember my first embarrassing experience buying a trending imported peanut butter. Upon opening the lid with great expectations, there was a layer of oil floating on top while the peanut butter below was as dry as cement. I naively tried to scoop it directly with a spoon, resulting in either too oily or too dry portions, making it impossible to properly enjoy the taste.
Later, during a video livestream, a foreigner taught me to use a butter knife to make circular motions from the jar's edges toward the center, then stir from bottom to top. This tip was a lifesaver! Now, whenever I get new peanut butter, the first thing I do is mix it thoroughly using this method. During mixing, it's particularly important to patiently combine the dry bottom portion with the oil on top. Through practice, I've found that peanut butter treated this way can maintain perfect consistency for at least a month.
Moreover, I've developed a complete peanut butter storage solution. First, it's best to mix peanut butter at room temperature for better blending; second, after mixing, invert the jar for a few minutes to let air bubbles rise to the bottom; finally, store it in a cool, dry place away from direct sunlight.

Herb Preservation Technique
For young cooking enthusiasts, fresh herbs are essential for elevating dish quality. But many people face a common problem: bought herbs turning yellow and spoiling after just a few days, which reminds me of my heartbreaking experiences when I first started cooking.
Now I've developed a complete herb processing method. First, gently slide your fingers along the stem direction to separate leaves from stems. This action seems simple, but be gentle to avoid crushing the leaves. Don't put the processed leaves directly into the refrigerator; instead, gently pat them dry with paper towels, then place them in a storage container. Here's a tip: line the container bottom with a paper towel, arrange the herb leaves neatly, then lightly spray with a bit of water to maintain proper humidity.
With this treatment, different herbs can be preserved for varying lengths of time. Delicate herbs like basil and cilantro can last about a week when properly handled; while hardier herbs like rosemary and thyme can last over two weeks. I've also discovered that different herbs have different optimal storage temperatures. Herbs like mint are best kept in the middle shelf of the refrigerator at 4-6 degrees Celsius, while cilantro is better suited for the lower crisper drawer at 2-4 degrees Celsius.
Cooking Tips
The Trick to Prevent Boiling Over
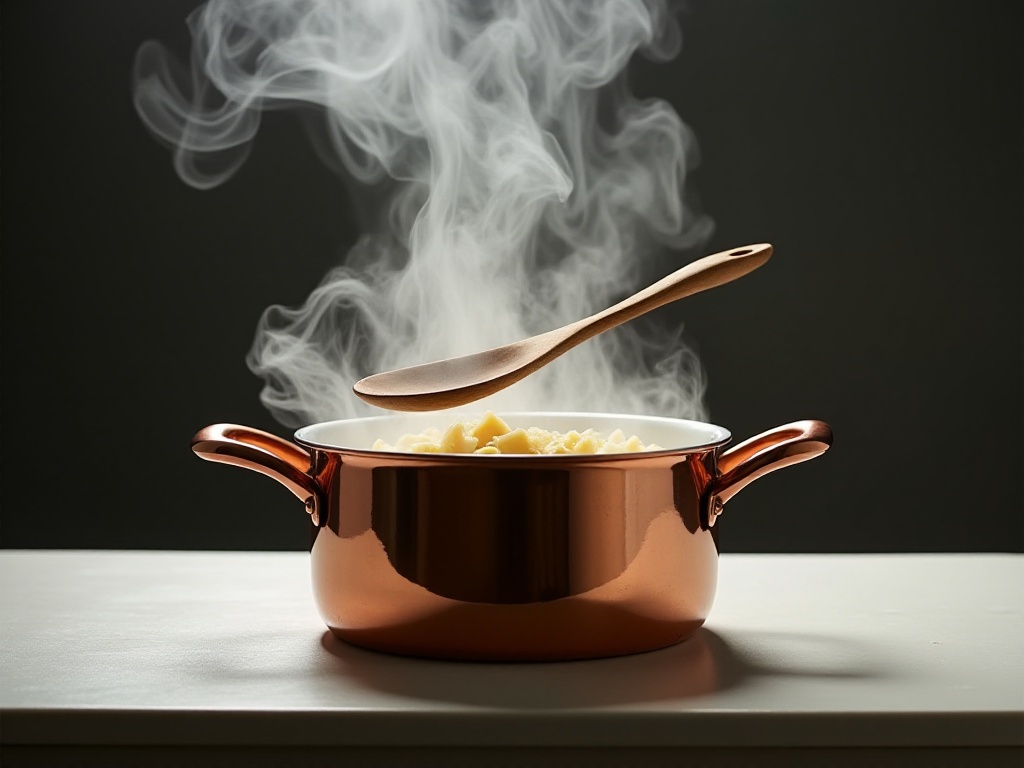
As a working professional who often cooks instant noodles late at night, I fully understand the frustration of pots boiling over. Once, starving at midnight, I was cooking instant noodles when water spilled everywhere, and I spent ages cleaning up while nearly waking the neighbors. Later, I learned an extremely useful trick from a short video: placing a wooden spoon across the pot.
The principle is actually quite simple - the wooden spoon breaks up the formation of bubbles. When water boils, bubbles rise to the pot's rim and break upon meeting the spoon, effectively preventing overflow. However, the spoon's position is crucial; it must be placed horizontally across the middle of the pot, not tilted or at the edge.
Besides this method, I've discovered several other tips to prevent boiling over. For instance, adding a little oil to the water before cooking noodles can reduce surface tension; also, choosing the right pot size is important - too small and it easily overflows, too large and heat efficiency suffers. Through practice, I've found that filling the pot to about two-thirds is optimal, ensuring food cooks thoroughly without easily boiling over.
Clean As You Go
Speaking of this, I must mention my "dark history." When I first started cooking, the kitchen would look like it had been hit by a typhoon after each meal. Condiment bottles scattered everywhere, cutting boards piled with food scraps, and dishes stacked mountain-high in the sink. Once when I invited friends over for dinner, I spent nearly an hour just cleaning the kitchen, leaving my friends almost falling asleep waiting outside.
Later, I developed a "clean as you go" method. Specifically, I divide the cooking process into several time periods, completing cleanup tasks during waiting intervals. For example, while waiting for water to boil, I wash the cutting board and knives, and organize remaining ingredients. Soup simmering time is perfect for cleaning - I can return condiments to their storage places and wash used cookware.
This method not only keeps the kitchen consistently tidy but also improves cooking efficiency. Now I typically only need to clean the last few utensils used after cooking to restore the kitchen's tidiness. Plus, doing cleanup tasks during waiting periods helps maintain focus and prevents forgetting about cooking times.
Cleaning Tips
Stubborn Stain Removal
When it comes to kitchen cleaning, stubborn stains are the most troublesome, especially the grease on oven doors - the ultimate cleaning challenge. When I first got my oven, after some use, thick grease accumulated on the door. I tried various cleaners, scrubbing until my hands nearly fell off, with unsatisfactory results.
Later I discovered a magical cleaning method: using a professional scraper with cleaner. First, choose an appropriate scraper, preferably a plastic one with a non-slip handle to avoid scratching equipment surfaces. When cleaning, first spray professional grease cleaner on the stained area, wait a few minutes for it to penetrate, then gently scrape at a 45-degree angle.
There are several important details in this process: first, use moderate scraping pressure - too much can scratch equipment, too little won't clean effectively; second, maintain consistent scraping direction, preferably top to bottom; finally, wipe clean with a clean cloth to avoid cleaner residue.
Besides ovens, this method works well for cleaning grease from stovetops and range hoods. However, different equipment surfaces require different cleaning tools. For instance, stainless steel surfaces need specific stainless steel cleaners, while enamel surfaces require gentle cleaning products.

Label Removal Method
This is likely a common frustration for everyone who collects glass jars. I often keep attractive condiment jars for reuse, but their labels are always annoying. Some labels leave ugly adhesive residue when removed, while others won't come off at all.
After multiple attempts, I finally found a perfect solution: heating labels with a hair dryer. The process is simple - set the hair dryer to medium heat, aim at the label for 20-30 seconds, and once heated, the label peels off easily. This method works because heat softens the label adhesive, making it lose stickiness.
For particularly stubborn labels, I'll apply some cooking oil after heating, which helps soften the adhesive and prevents label fragments from scattering. After removing the label, clean the jar surface with cleaner to remove oil residue, and the glass jar is ready for reuse.
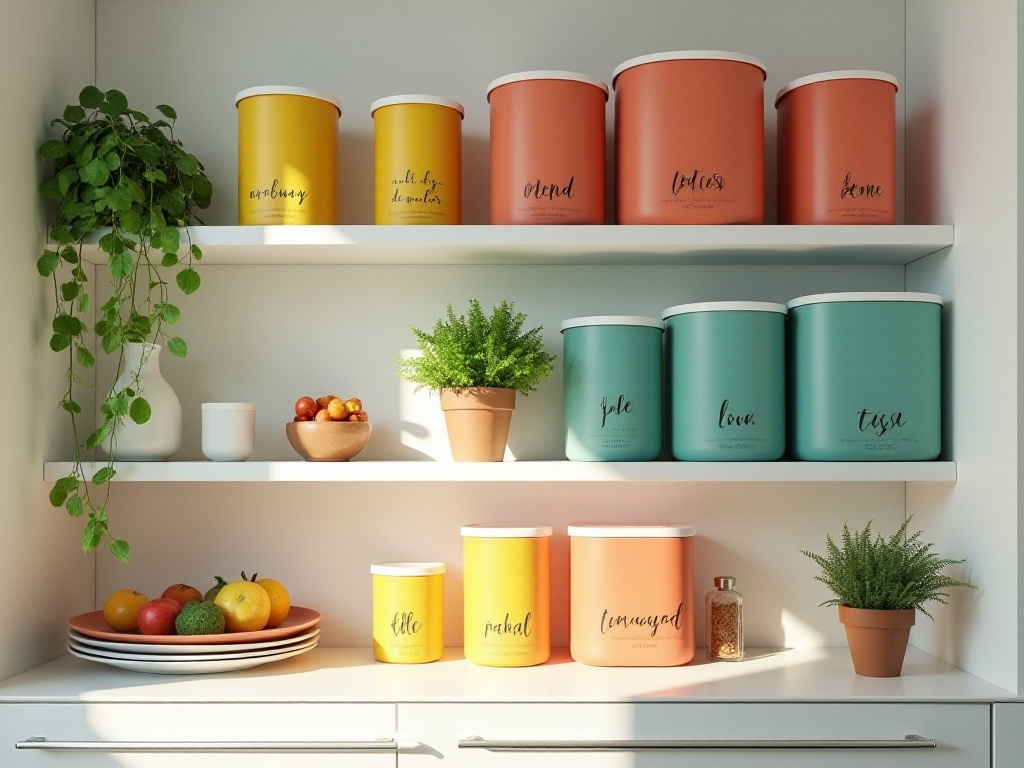
I've now collected quite a few beautiful glass jars for storing various seasonings and dry goods. They're not only practical and attractive but add an artistic touch to the kitchen.

Storage Organization
Freezer Organization Method
Honestly, refrigerator organization is a major challenge for those living alone. At first, I simply piled things randomly, resulting in frequent awkward situations: couldn't find desired items, while expired food was often forgotten in corners.
Now I use a categorization method. First, store different types of food in separate storage bags: one area for meat, one for seafood, one for frozen foods. Each bag must be clearly labeled with contents and storage date for easy identification.
I also arrange storage locations based on food characteristics. For instance, seafood that easily transfers odors should be stored in sealed bags at the freezer's bottom level; frequently used frozen dumplings and buns should be easily accessible; while long-term storage items can be placed in deeper positions.
Additionally, I regularly "deep clean" the refrigerator, promptly disposing of expired or nearly expired foods. This maintains refrigerator cleanliness while preventing food waste.

Key Identification Technique
Although this tip seems unrelated to kitchens, it's particularly useful for those frequently accessing storage rooms. I have several similar keys, and previously often had to try several times to find the right one, especially troublesome when carrying items.
Later I thought of marking keys with nail polish. Storage room key blue, back door key green, refrigerator spare key pink. This way, even in poor lighting, I can quickly find the needed key.
When choosing nail polish, note several points: first, select brands that don't easily chip for lasting marks; second, choose bright colors for easy recognition; finally, remember to reapply regularly to maintain clear markings.
Summary Moment
These seemingly simple tips are what I've continuously explored and summarized from daily life. They might not be groundbreaking inventions, but they truly make our kitchen life easier and more enjoyable. Like now, cooking dinner after work is no longer a headache but has become a way to relax.
The kitchen isn't a battlefield but a happy place for creating delicious food. I hope these experiences help you avoid some detours and make cooking a joyful activity. If you have unique kitchen tips, feel free to share them in the comments - perhaps we can discover more useful tricks together.
Finally, cooking is like life - seemingly complex but actually simple. Once you master the right methods, you can handle every little thing orderly. Let's enjoy the pleasure of cooking and create our own culinary paradise!